Decorating children’s bedrooms is a favourite of mine.
Maybe it’s the sense of fun that can be had with your child when creating the new space or the fact that creatively, nothing is off limits!
In our current home, we launched straight into renovating the boys’ bedrooms with thankfully no structural changes required. Bringing each of the lads’ personalities into their room was important to create spaces they’d both love and feel at home in.
Having the funds to renovate can be a hurdle but, if you shop around, undertaking a kids’ room makeover doesn’t have to cost a fortune. Find old items and bring them back to life or get creative with bargain finds and some paint.
Inject fun and function into your little one’s bedroom with these five simple and affordable DIY projects.
1. Bedhead
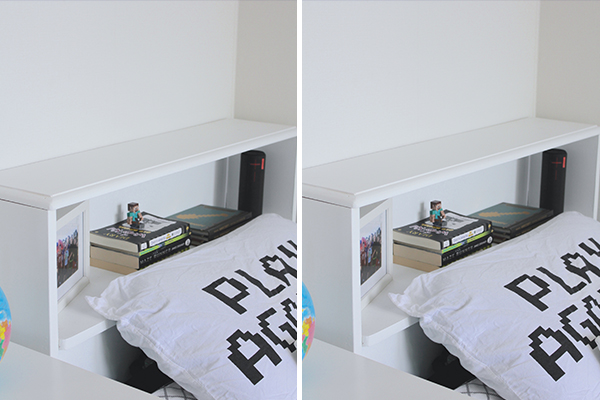
Dylan’s bed lacked a bedhead and after struggling to find one he liked, we came across an old timber bedhead in a second-hand store for the bargain price of $5.00.
Covered in a clear coat varnish that had yellowed over time, I sanded it right back with an orbital sander to its original timber finish. After a few coats of Dulux Okarito white, it was as good as new.
Dylan loved the functionality of the recessed shelf and being able to store his favourite books, photos and a mini stereo. I love the instant transformation it gave his bed and how easy and affordable it was to create.
2. Display shelf:
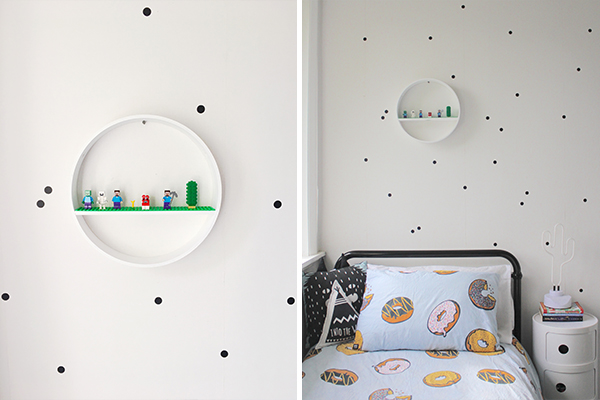
Our youngest son adores Lego and is forever building new creations. Rather than his mini figures being hidden away in a box, he wanted to display them in a fun way. We came up with the idea of creating a Lego shelf he could set them on and easily interchange.
I purchased a cheap circular shelf from Kmart and painted it. Using a craft knife I trimmed a Lego base to fit the shelf dimensions and glued it on. Super quick and easy to make, it now serves as a three-dimensional piece of art.
3. Floating desk:
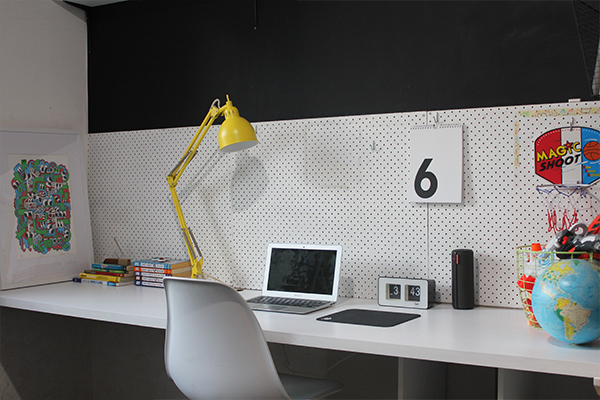
Dylan’s bedroom had a 2.4 metre-long alcove, from where a built-in wardrobe had previously been positioned. We knew that, as he grew older, having a dedicated desk space for studying was going to become important. Making the best use of this narrow space, we chose to install a floating desk, spanning the full 2.4 metres.
This one was a real DIY job. We sourced a Formica benchtop for its ability to be self-supporting and durable. A ribbon board running underneath the desk was installed for additional support.
Before pegboard was all the rage, I screwed a sheet from Mitre 10 onto the wall to provide a handy place for Dylan to hang his headphones, art, notices and other bits and pieces.
4. Art corner nook:
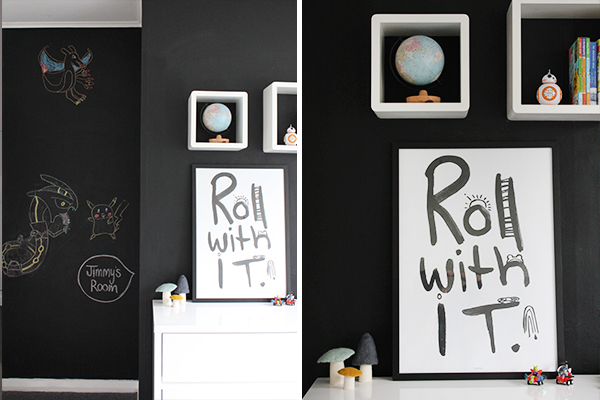
What kid doesn’t love a blackboard wall? Our youngest son James adores drawing so I wanted to create a nook in his bedroom where he could enjoy getting creative.
I used chalkboard paint to turn an alcove space in the corner of his room into an instant art nook. It certainly gets a lot of use, especially when friends come over or on wet inside days.
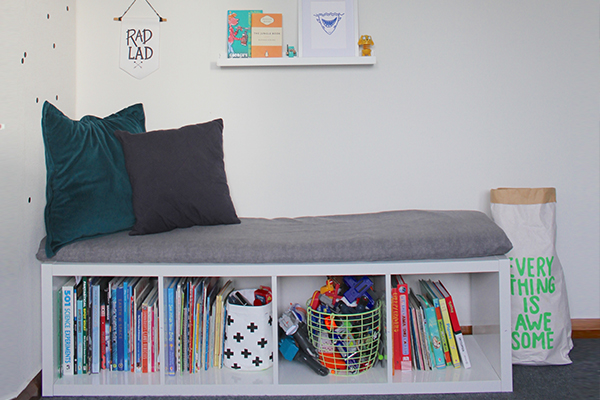
5. Bench seat:
It’s important to create space in your child’s bedroom for the things they love. I wanted to encourage James’ hobby of reading by adding a bench seat to his room, so he could explore his favourite books while laying in the sun.
I spent what felt like forever trying to find one the right size and design, that also provided storage underneath.
I ended up saving money and time by purchasing a solid bookshelf and laying it on its side. Then, I simply cut a foam mattress to size and sewed together a cover to place over top.
The finished result makes for a great seat to enjoy reading or playing on and serves as a good storage solution for books and toys.
Kelly Evans is a blogger, writer and stylist. Kelly shares stories on clever people and great design on her website, thehomescene.nz. Click here to read more from Kelly.
All images courtesy of Kelly Evans, thehomescene.nz
13 Jun 2017

